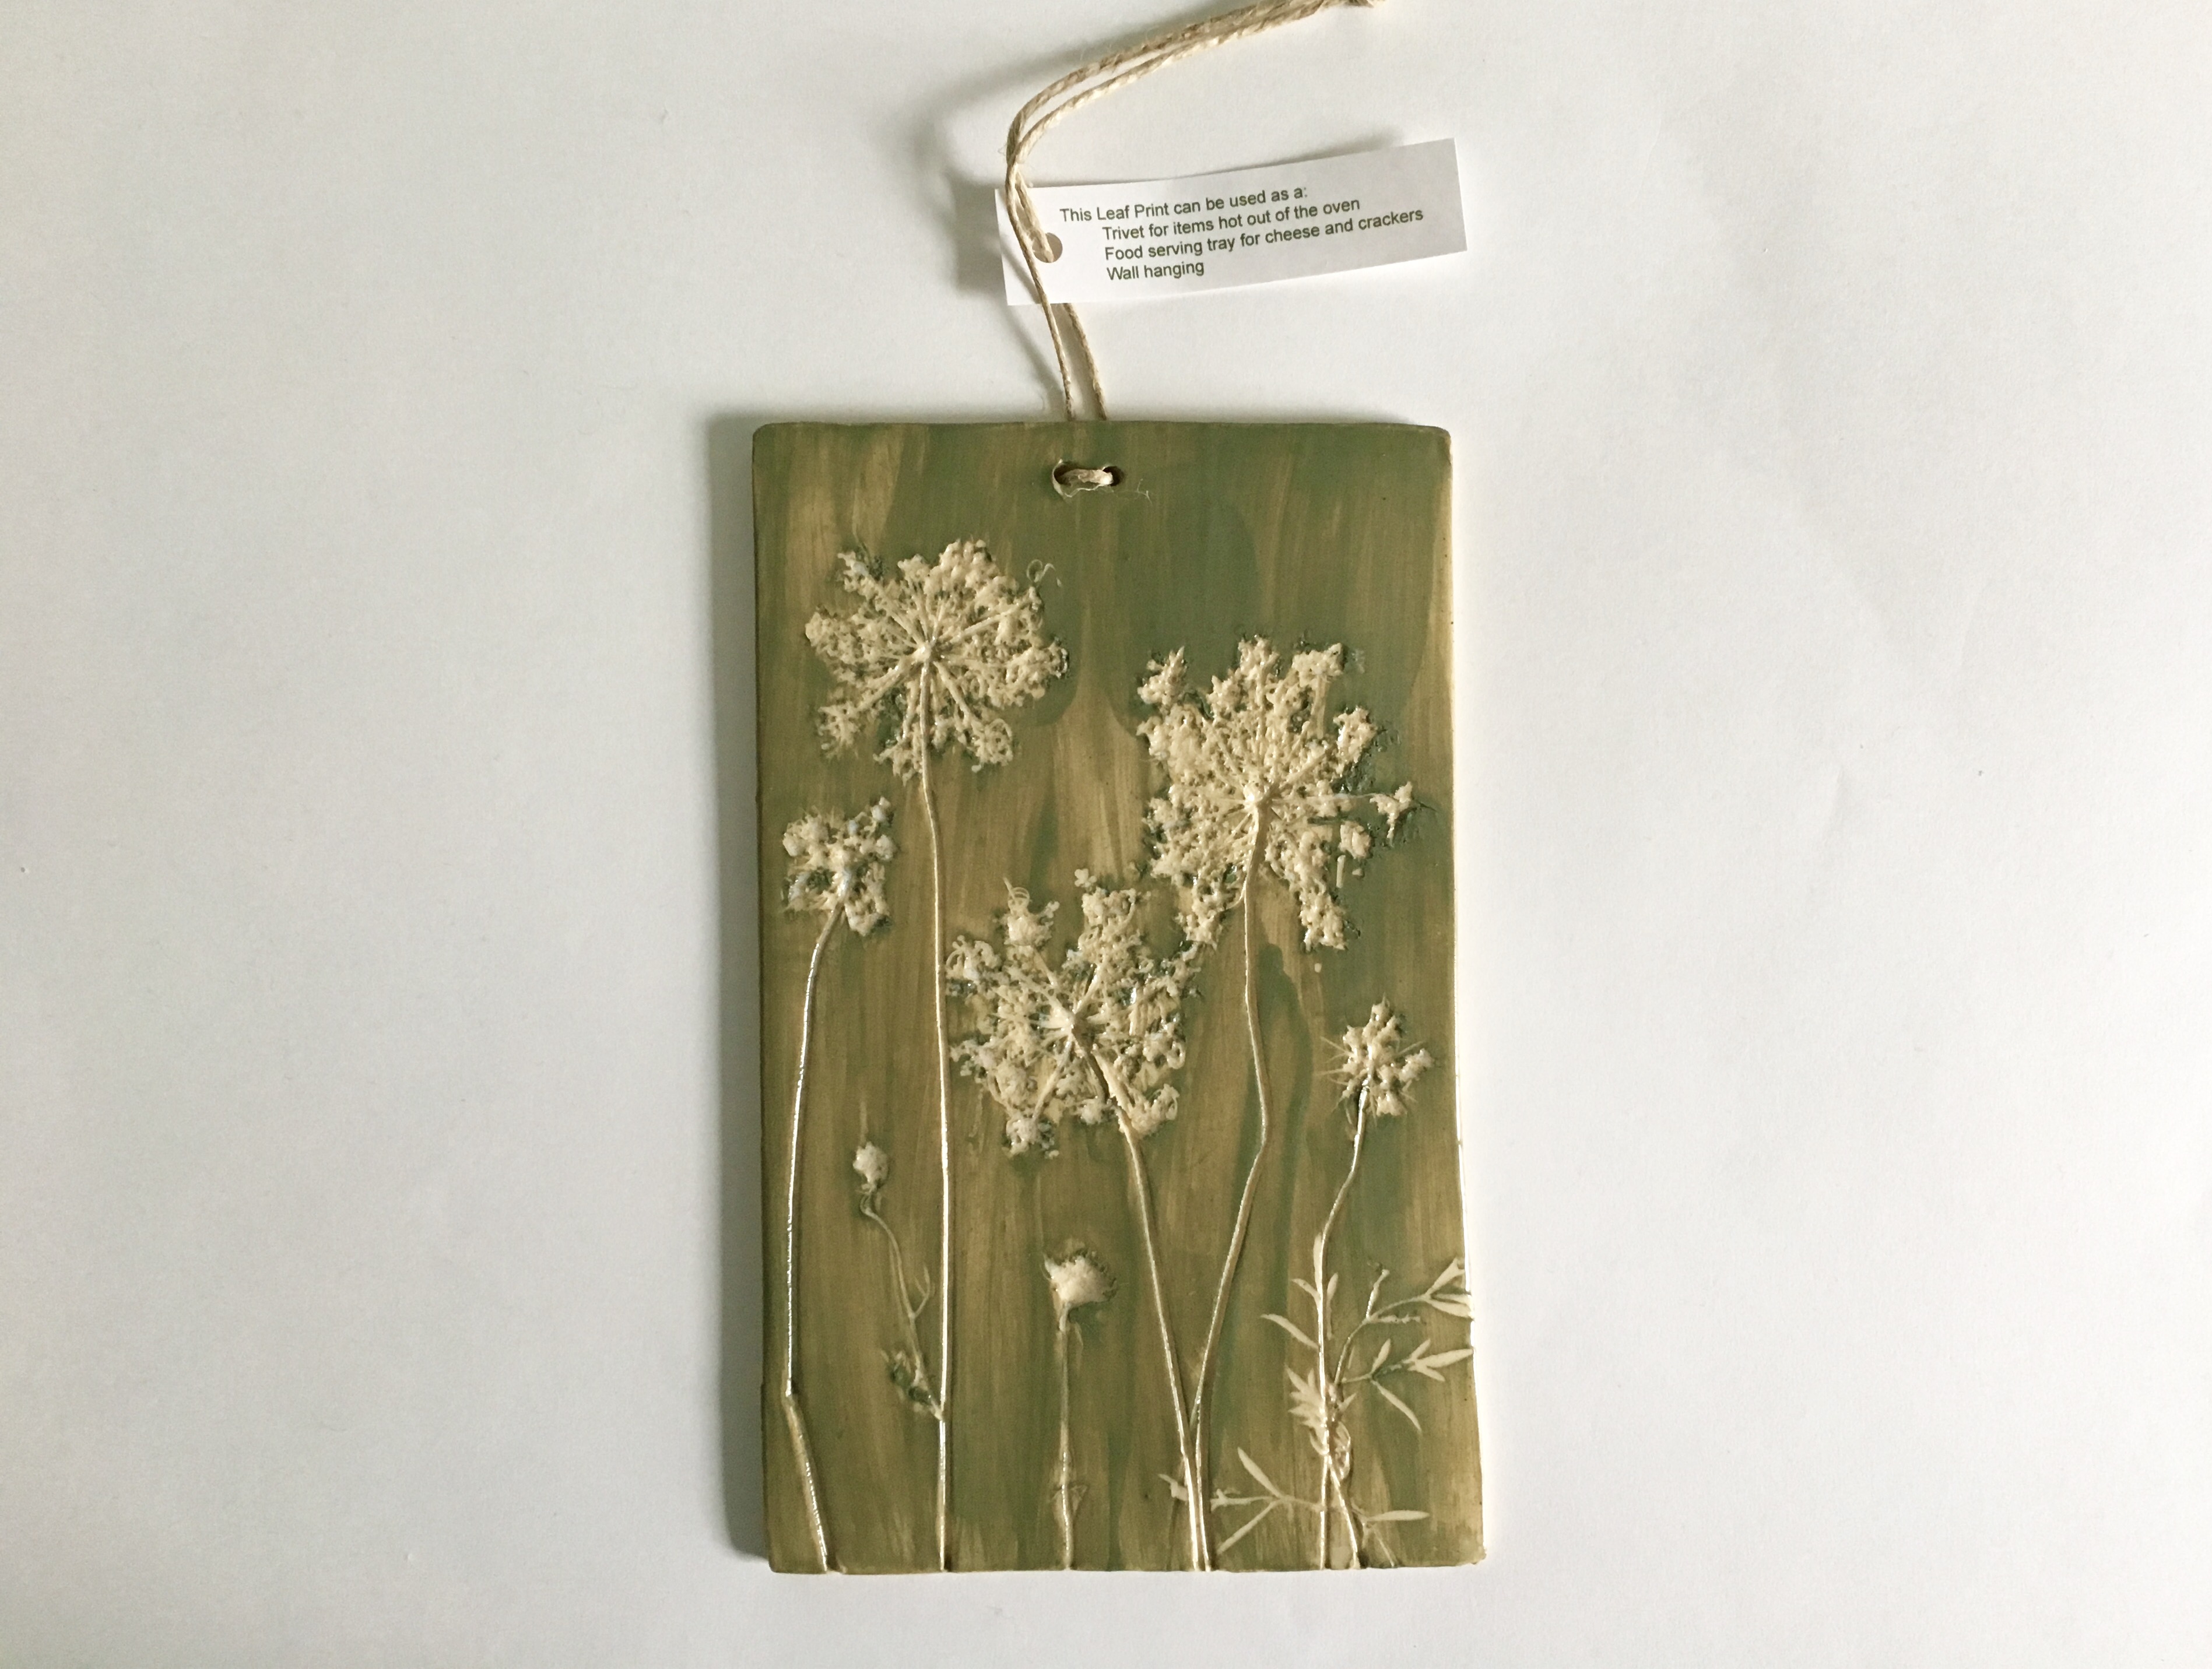
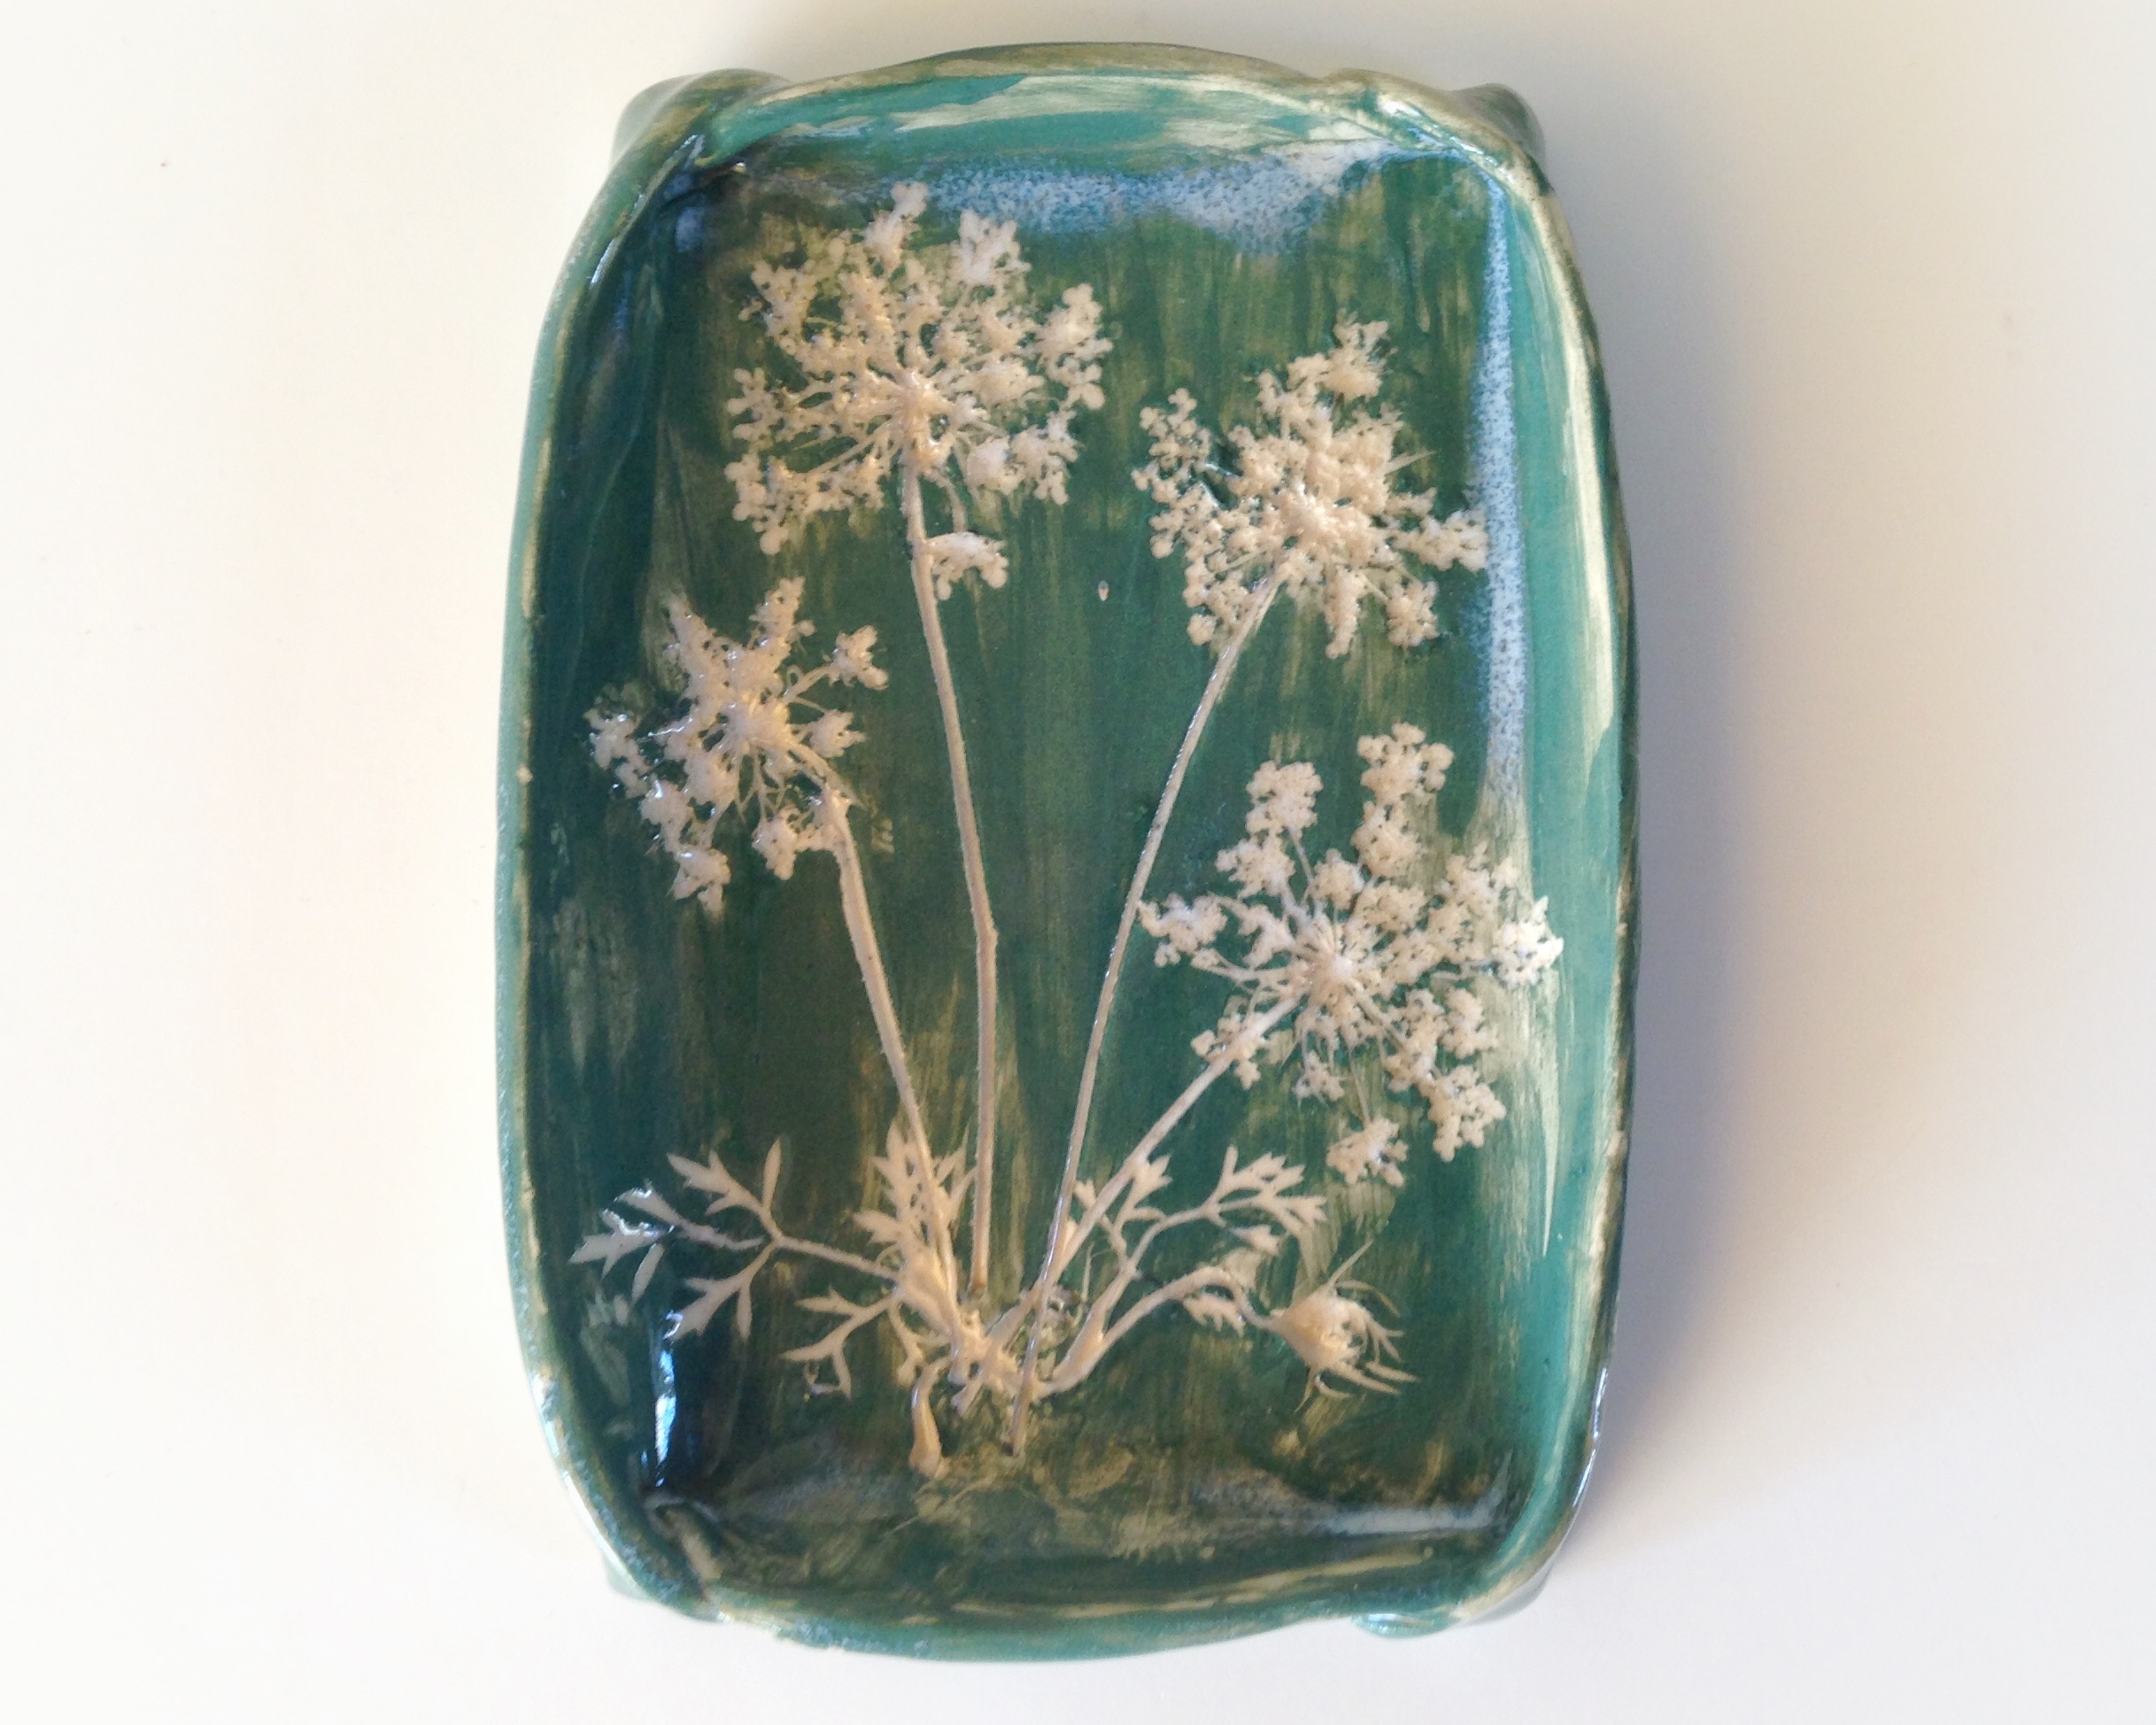
Queen Anne’s Lace is one of my favorite wild flowers, and I often use it in my botanical pottery pieces. In Vermont, where the growing season is short, the Queen Anne’s Lace is starting to go to seed. Though there has been plenty of time to work with this plant, my summer was quite full running Clay Play Camp and doing a myriad of other things, so I am feeling squeezed to make the Queen Anne’s pieces that I had hoped to make before their season ends.
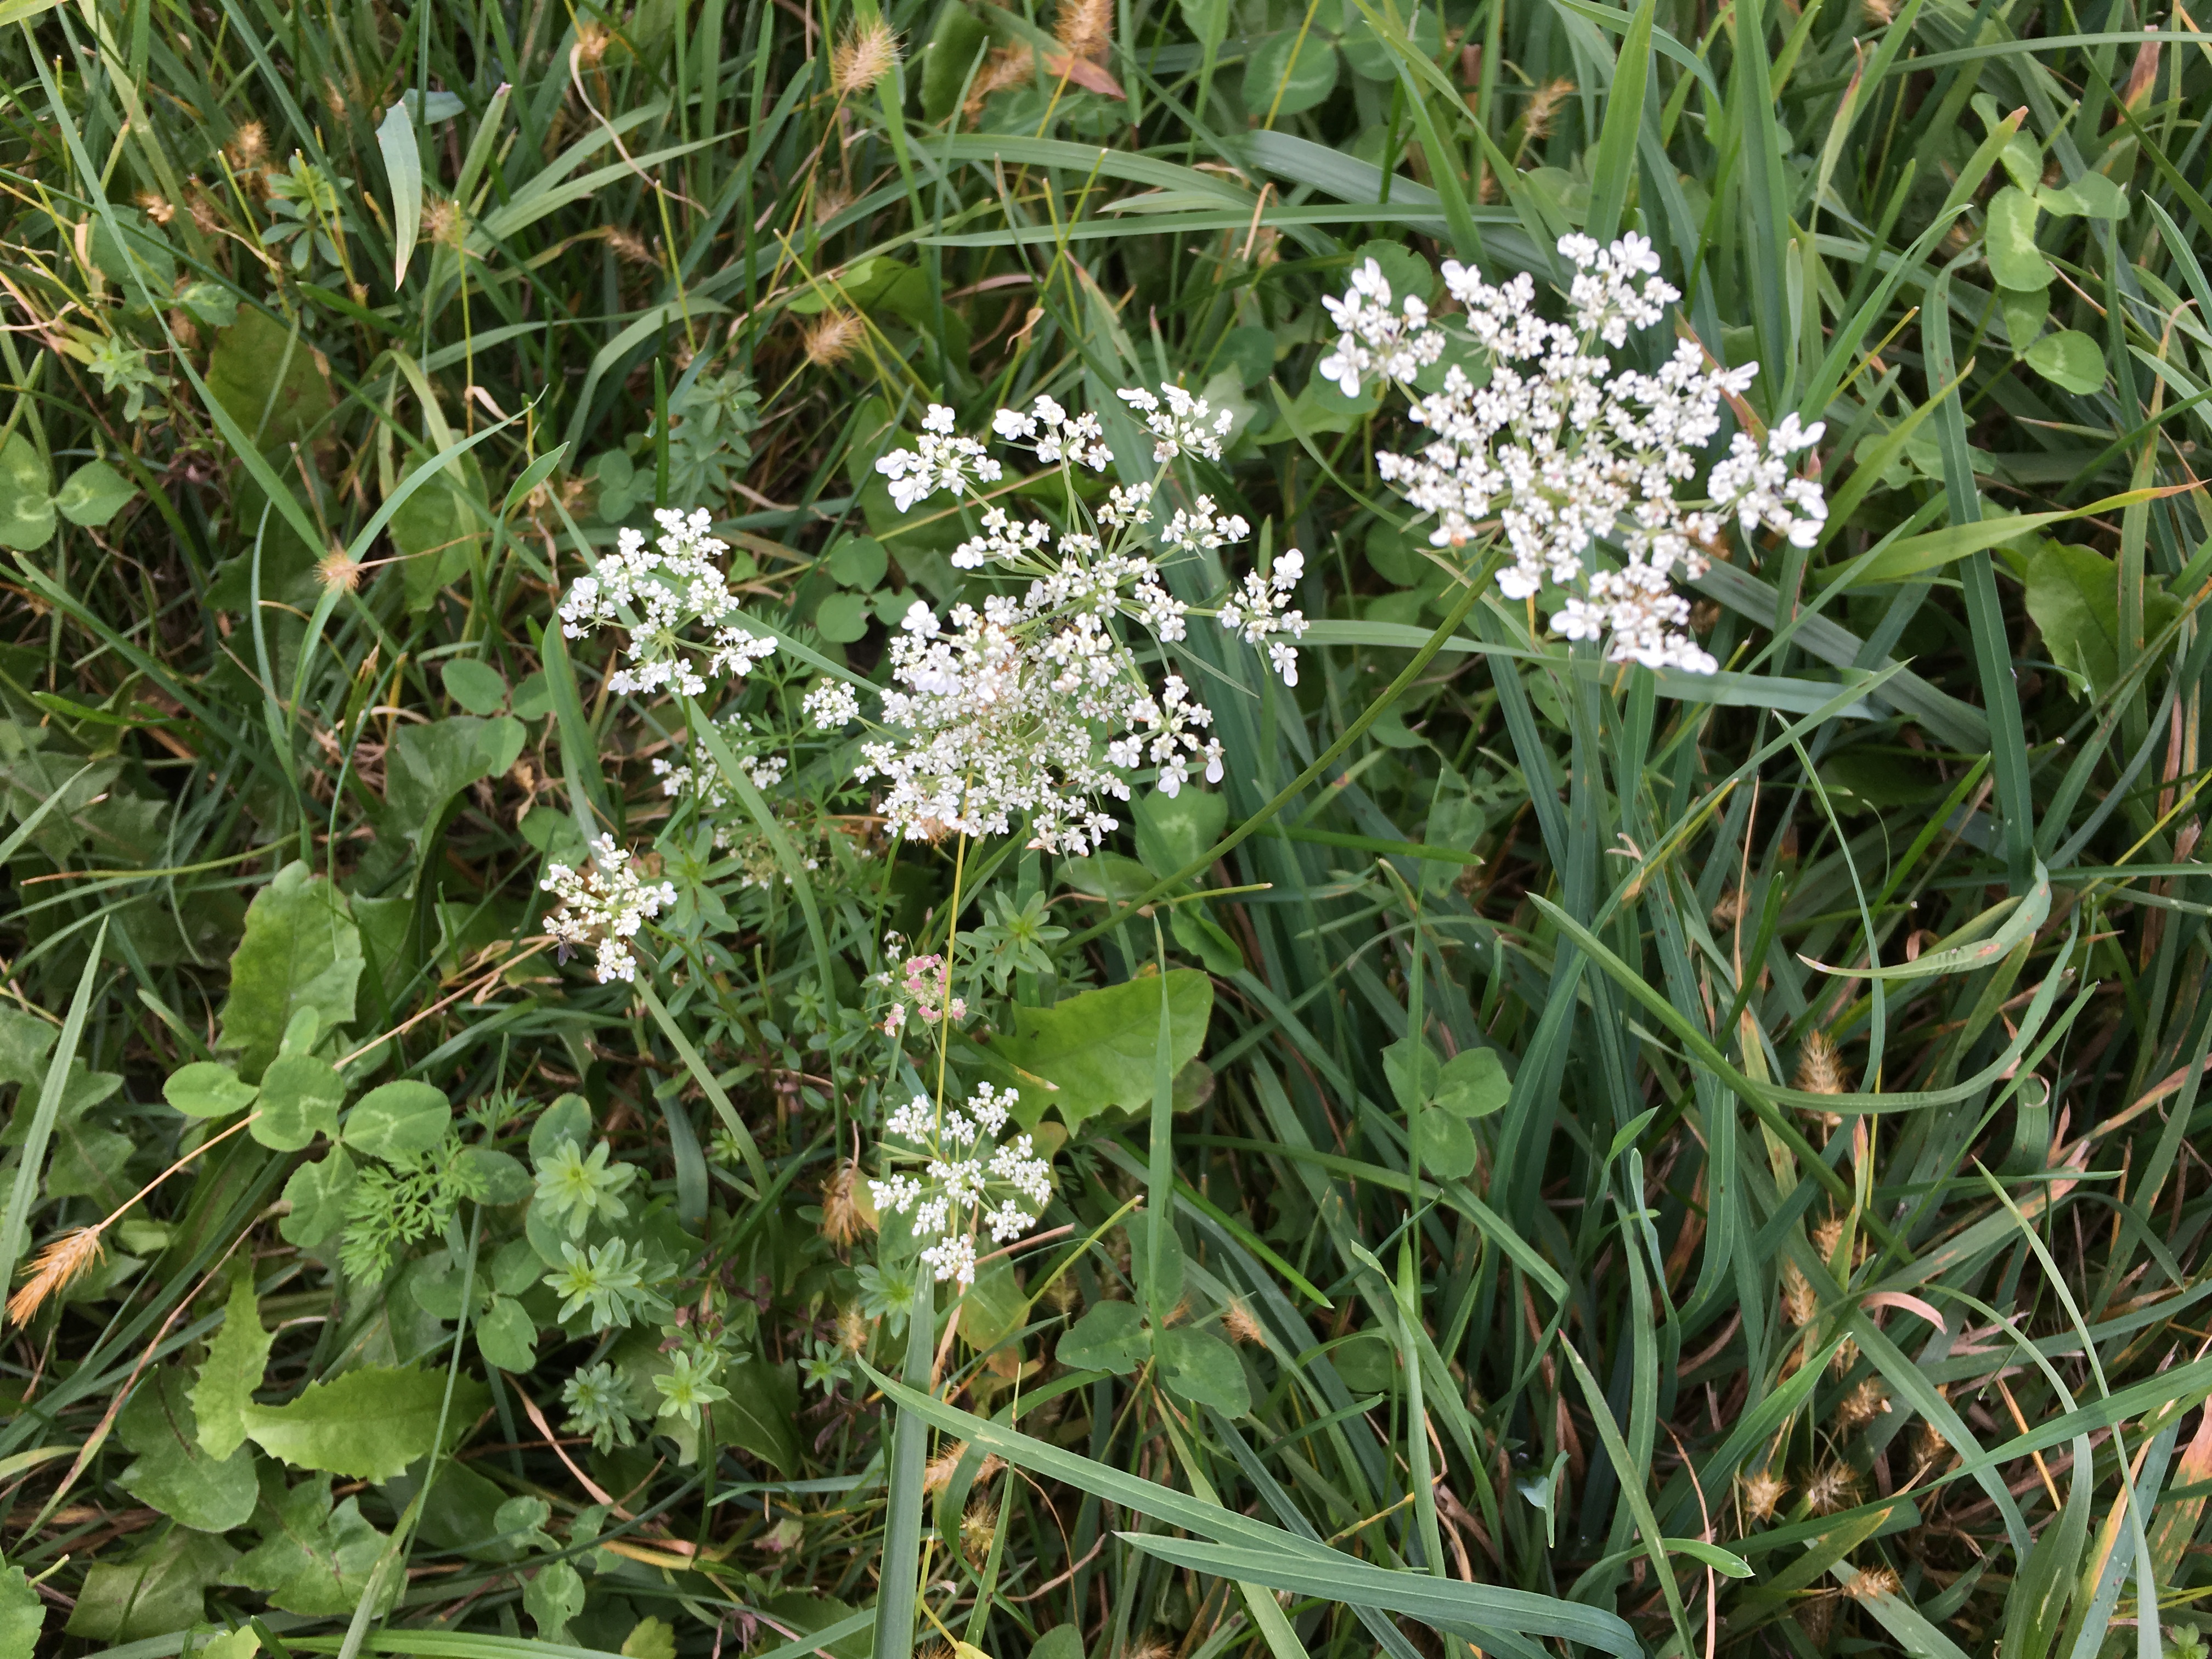
Just as its name suggests, this plant is both delicate and regal. Like a queen, it has a certain strength. It doesn’t blow over in the wind, or bend with heavy rains, and its white flowers stay proud and white before curling up to a strong boney frame that lasts through the winter months, poking out of the snow so you can remember the warmer days behind you and those yet to come. In the summer it grows in fields and on roadsides, volunteering itself with ease. Yet, when you go to pick it, it doesn’t break free from where it has rooted itself very easily. I must remember to collect it with clippers in tow and a bucket of water to place the picked flowers in. For if the Queen Anne’s Lace is without water, it quickly shrivels up into a wilted mop, and its white petals become dust.
In Victorian times, flowers and plants were assigned meanings, and remembering this symbolism in modern day is still popular. I enjoy thinking about these meanings when I work with a particular plant. In the secret language of flowers, Queen Anne’s Lace is a symbol of femininity and represents perseverance in love. It is a prolific plant which spreads its seeds in the wind and is even considered an invasive plant in some states. Originally a native plant of Europe, Queen Anne’s Lace was popular in the during the reign of Queen Anne. It is also known as Wild Carrot because it is related to the carrot, but it is actually in the parsley family!
Queen Anne’s Lace has medicinal uses. The seeds have been used to help clear out urinary stones, and the roots which are like carrots, have been used as antacids. A poultice of roots can be used to relieve itchy skin.
Invasive or not, I love the wispy appearance of this plant despite its true tenacity.
There are so many aspects to running a ceramics and pottery business, and taking photos of my work is one of them. I have tried many techniques over the past few years, and I continue to make tweaks to my systems for ease and better quality. My photographs are by no means professional quality, and I still have a lot to learn, but I can do it myself.
The best part that I notice over and over, is that when I do a photo shoot of my work, I find myself falling in love with each piece. Looking at each item closely, trying to show how it functions and convey what makes that piece special is kind of magical. It makes me excited to get back to clay and make some more. Since I specialize in one-of-a kind work, and I sell a lot of pieces on line, I spend a lot of time photographing and editing photos. Lately I have been wondering if I should start making more multiples, but that is another story. So for now, I photo and edit constantly.
Back story and my current system for taking photos:
Once upon a time, I went to a workshop on how to take photos of your artwork. It was a fascinating class, and I came away from it equipped with knowledge and ideas. Unfortunately, I didn’t have the budget to support all of the professional photography equipment that I learned about. My photographer cousin gave me directions on how to create the budget version lighting system, and I tried. My husband, the engineer, got really excited about it too, and he tried to make me a light box and worked on various lighting solutions. All of our attempts added up to crappy photos, so I went back to what I had been doing. Below I address three main points: light and background set up, camera, photo editing.
Instead of a light box and professional lighting, I photograph by the natural light of a window. I used poster board as my background for several years, but have recently upgraded to a photo paper background. I have also moved my station to a permanent set up on a table instead of getting up and down off of the floor and constantly rolling up my paper each time between photo shoots. (The pets in the house always think that the photo paper is the best place in the house to walk, of course!)
I learned in the photo workshop that I should use a “real camera”. Again I tried, but I like things that are REALLY simple. When I take photos using a “real” camera, I also have to use a desktop computer to load the photos and edit them. Unfortunately sitting at a desktop to load, organize and edit photos does not agree with my personality type. We have to be true to ourselves, right? So I continue to use my iPhone to take photos, and I have fully come to peace with that. Fortunately the camera on the phone keeps getting better and better.
For editing photos, I kept hearing about a popular software for the desk top computer. I tried it, but it felt too complicated and laborious for me with the multitude of photos that I have to edit. I just can’t sit in front of a computer for that long! So I went back to my happy way on the iPad. I use a photo transfer app to shift the photos from my iPhone to my iPad, and I have created albums in my iPad such as “to edit” and “ready to list” for my work in progress. It is so easy to do a transfer, as all I need is wifi- and no cords. To do the editing, I use the app called Snap Seed. I like the portability of the iPad for editing, and I am just so much faster and adept at using the touch screen.
A few simple tips:
Pick a bright day that is not too sunny. Sun reflects off the pottery glaze and makes big glare areas.
Set up an area with a background that allows you to show off your work. I have stuck with white, though I have tried a few other backgrounds. Why? My work has a lot of color and variation, and the white background shows off the pieces the best, in my humble opinion. I am glad that I invested in photo paper because it is much wider and longer, so I don’t have to worry about the edges of the paper as I did with poster board. However, I went for years using inexpensive poster board, so that is a good inexpensive option if your pieces are not too large.
Take a lot of photos. Take them from every angle, and turn the piece around. Prop it if you need to catch the light in different ways. Find things to put around your piece to show how it fits into the everyday world. Take time to fall in love with your creation so that others can fall in love with it too.
Be honest. Don’t disguise defects. Don’t over edit. Allow your piece to speak for itself. With that said, one of the hardest and most challenging things for me is to make the photo of the piece look half as beautiful as the piece itself. My work almost always looks better in person, but then pottery is so tactile and three dimensional, and it is very difficult to represent in a 2-D format.
Winter took a long time to come this year, but as sure as ever, it is here at last. For me the cold means closing down my studio, and moving everything into my basement until the temperatures are mostly above freezing again. In Vermont, that usually means late March or early April. Though I have a heat source, I cannot keep the barn warm enough to risk that my precious clays and glazes won’t freeze. Even with the heat on, there comes a point where I just can’t be warm enough in there to work anyway. Clay is cold and damp as it is.
So even though it was a muddy Christmas, and we were able to barbecue instead of ski, I was not complaining at all because it meant that I could keep making pottery in my studio. This was the furthest into the winter that I have ever been able to keep working, and I was happy.
The winter is when I can take stock, regroup, plan my future, do all of my clerical work, and dream about what I want to make next. I usually find myself making a few things in the basement, but in a 200 year old farm house, it is not the most pleasant place to work.
Even though I am a hearty Vermonter and go outside nearly every day for long walks, I kind of endure the winter, and I long for the days when I can pick fresh plants and flowers and make more botanical pottery pieces.
Maidenhair ferns growing in the spring.Maidenhair bowl
Every morning the day seems so expansive with so much time ahead to do everything. Then the hours slip away and into days and even months. Where does the time go in a full life?
We all know how time can tick on ever so slowly when we have to do something that we don’t want to do. But when there is so much we want to do, there is never enough time to get to everything. For me, every day is kind of like that, because I enjoy doing so many things. I am organized and efficient, and even when I am relaxing, I am usually doing something. I can almost always reflect back on my day and recognize my accomplishments. I took a walk, I cleaned, I cooked, I went to work, I paid the bills, I gardened, I connected with a friend, I talked to my mom, and generally I have
crossed off a whole lot from my to do list of personal goals. Yet often when the day ends, there are certain things that I just don’t manage to get to even though it has been on my list for months. Writing on this blog is my best example of this. I have wanted to write, and I have written many blog posts in my head as I have been walking the dog or doing other things, but then I never find the time to take my thoughts out of my head and put them here. So today and from now on I am going to change that. Writing hopefully will become like brushing my teeth. I don’t even have to put it on a list to find the time.
This is the time of year that I am racing against the cycle of the growing season coming to an end. I use fresh plants to create my botanical ceramic pieces, and the plants are starting to die. A killing frost is in the forecast for this upcoming weekend. All during the growing season I collect plants from my gardens and from the woods and store them in buckets in my studio. Right now, the studio is filled with buckets of all kinds of ferns, herbs, and woodland plants that I collected this past weekend on the Appalacian Trail in the White Mountains. In time the plants in the buckets will die too. And so, I am racing against time that is often beyond my control. And it is all good.
Plants waiting for their turn to be pressed into clay.
It felt somewhat daunting to carry out my big idea of turning a small barn on our property into a pottery studio, but I have had a lot of fun along the way making a dream into a reality. I have discovered that a lot of small steps can add up to a big accomplishment, and that is how my pottery business was born.
When I first had the idea to make pottery, I had no plans to turn it into a business. Our family had moved into an old farmhouse with an empty barn, and with the enormous support of my handy husband, we decided that the barn provided an opportunity to create a studio. I always liked making crafts and enjoyed working with clay, but it is a difficult medium to use if you can’t fire the clay into pottery. So I bought a used kiln, a few bags of clay, and a how-to book for beginners. My focus was on setting up a hobby studio on a small budget and figuring out how to fire a kiln. My first pieces were pretty awful, but I paid attention, took some notes, and then made more work.
After a while I needed a way to pay for my somewhat expensive hobby. My kids were school age, and summer camps were expensive, so I had the idea of bringing camp to us. Clay Play Studio Art Camp was born on a shoestring and with no grand plan beyond the first summer. It started as a fun idea that would incorporate my love of clay with my love of teaching, but little by little it has grown into an established program with a full time assistant. Many campers return year after year into their teens, and I am proud to say that I fill up early each summer.
Inside the studio I have a big table that my husband built for me to do my hand-built pottery.My older daughter during one of the first summers of Clay Play Studio Art Camp.My younger daughter and her clay creation at clay camp. It lives in our kitchen and holds yummy things.
Two years ago I started my online Etsy shop. It felt like a monumental task before I started, but as I took the steps to make it happen, I was surprised by how easy it was. The financial investment was so small that I felt compelled to give it a go. I still have a lot to learn about how to photograph my work, how to describe the pieces, and how to ship, but it has been so exciting and so much fun to learn. Previously I had been selling my work on a very small scale locally, so it still amazes me that I am now shipping my work around the world!
Most recently I took a step out of my comfort zone to develop this website. Believe me, I am about the furthest thing there is from a techie. In my household I am better known for messing up the computer than for making it work. The idea of building a website by myself seemed like a tremendous task. I have been surprised that it has been easier than I thought it might be, and as I take on the endeavor piece by piece, my site is taking shape. The other day I even figured out how to add a plug-in and create a widget, two bits of terminology that I never heard of until a few weeks ago. Now readers can sign up to subscribe to receive future blog posts!
Many years ago when out on a walk through the Vermont hills with my dear college friend, Grace, she said to me, “walking is so easy, you just put one foot in front of the other.” I was chugging along on that walk, and it didn’t feel so easy in the moment, but it made sense then that just one step at a time added up to a significant walk. “One foot in front of the other” has turned into one of my self-talk mottos for how I approach my life, as each small step I take leads me towards a bigger goal. When I first got the idea to make a studio at home, I could not have envisioned how my desire to make some pottery for fun would have impacted my life so much today. By pushing myself to take each next step, even when it has felt a bit overwhelming, I have experienced one of the most satisfying accomplishments of my life. As my children could tell you because they have heard it so many times (possibly to their annoyance): “It is better to do something than nothing at all”. When new ideas came to me, I could have done nothing, but all of those times that I did one more thing added up to turning a hobby that I loved into a successful business.
Every winter I have to close my studio because the little red barn is difficult to keep heated 24/7. When the temperatures drop I carry all of the clay and glazes into the protection of my basement for the coldest months of the year. In former years I used the winter time to take a forced break from my clay work.
Last winter I decided that instead of taking a break from my work during the winter that I would set up shop down under. I did, it was cold, it was poorly lit, but I was productive and I created a new line of work.
When we purchased the farmhouse, the basement had a dirt floor with little head room, but some years ago my husband dug it out (literally) and we had a concrete floor poured. The basement has a stone foundation that is over 200 years old, there are hardly any windows, and the ceiling is still pretty low.
*Winter studio in the basement of our 200+-year-old farmhouse. Notice the stone foundation.
Fast forward to this winter. I told myself that this year I really was going to take a break, and that I was not going to subject myself to the cold damp and dark work environment. Then I received a custom order that I really wanted to make. So here I am, back in the basement. And I am happy. In fact I can’t even imagine if there was no clay in my hands!
Winter as it turns out is a great time to make pottery. The busy days of the holiday season are behind me. The garden is not calling. Life is fairly low key. I am grateful for my basement.
*Pottery and a wall of shipping boxes surround the ping pong table.
*Clay camp tables and shelves come out of storage and are recycled for the winter studio.


